The Custom SPrites Tutorial Thread
From the original post: http://forum.zdoom.org/viewtopic.php?f=3&t=13992
Here's a quick tutorial on how to make various types of sprites, including differing recolors, edits, scratch, and those of centered and non-centered weapons. I'll do these in sections, starting with the hardest: Scratch Monster Sprites, as I'm already working on monsters for DE.
Be aware that these are only my methods, and they may not be the easiest out there. Since mine require drawing some drawing experience is recommended before attempting (you don't need to be very good at drawing to make nice monsters, though).
There are several other methods, such as modeling in 3D or in real-life. But i will only go
through the drawing method. If anyone else has other futher experience they would like to share,
feel free to post it in this thread, as this is meant to be a community tutorial, not just my
personal blabbering. ![]()
Feel free to share your opinions.
SCRATCH MONSTER SPRITES-DRAWING
THis is probably the hardest and most tedious type of spriting. Since even the most basic monsters have 40-60+ frames (Things with limbs), this task takes a very long time. It requires an understanding of how an object rotates, as well as how your monster moves. To draw these sprites well, you must understand the monster's movement, this is mostly for monsters with walking limbs (cacodemons-like floating monsters are pretty easy to make).
Here's is a step by step method of doing things:
-
Gathering Ideas:
It's best to have a general idea on what kinda monster you want, it's performance and role, as well as looks. Once that is done, make a sketch; it doesn't have to be a very detailed or very good sketch, just enough to use as reference for Step 2.
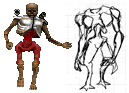
Here is a sketch i made for the redesigned Ignist from DE:

-
Movement:
Since this focuses on a complex monster, movement is important. Try to envision how your monster will move with it's various properties. If you're serious enough about spriting, you might actually wanna get a wooden pose refernce model to test this (or you cna stare at yourself in the mirror). Once you figure out how you want the mosnter to move around, it's time for the first real hard part: Drawing the Pose Reference Sheet.
Here is the pose Reference sheets for th Ignist monster:


These will be the base for your sprites. They should contain all the reotations (5 or 8, depending on how picky you are) for each movement your mosnter will make. I personally prefer graph paper as it helps be keep the size relatively constant and help with other aspect of perspective and whatnot. This task is tedious and it does take some understanding of basic anatomy. This sheet however, should not be too complex. If you are not too good at drawing, stick figures should suffice as this is only meant to be a reference to how your monster moves, not the act monster itself.
-
Size-Configuration:
When you make a monster, also decide on how big it's going to be relatively to the Doom marine or whatever you want. Ofcourse, with SCALE in decorate, this can be ignored, but I like to keep things consistent with Doom as much as possible in terms of size. Once you decide on the right size for monster, get a sprite from a existing monster (doom2 or whatever) and take it's Forward-facing frame as a guide. Be sure to choose the mosnter's tallest from-head-to-feet frame, as some monster hunch over when walking.
For the Ignist, i've chosen the Revenant to be the size reference. Note that I'm only going to edit ONE of the frames for my monster and very quickly, so it may look a bit sloppy. You will also need Photoshop to do this, but im sure Painter also has very similar if not identicle tools.
Take the size reference and paste it into a canvas of large enough size. That cut your frame out and resize it by first using the marque-tool (the box-selection tool) to wrap around your drawn-reference, then right-click -> Free TransForm. Now hold SHIFT and move your mouse to the corners of the selected area. You should see a double-arrow come up; move that around while holding shift to resize your monster while constraining the proportions.
Here's the finished product:
Note that you should resize the ENTIRE sheet and not just a frame at a time when doing an actual monster. I only did 1 frame because it would be too hard to do the entire sheet at once. You should also make sure the size of your own drawings match up here. If not, reize them relative to each other until you think it looks right.
Drawing the Base:
This is the actual thing you will sprite. Make a new layer ontop of your drawing and get the pencil too using 1-pixel brush to trace over the relative area of your drawn-reference. It doesn't have to be perfect, as this stage you should correct the mistakes on your drawing (as you can see, the size of the arms and legs are no consistence in my drawings, this is where you should correct it).
Here's the finished Base:
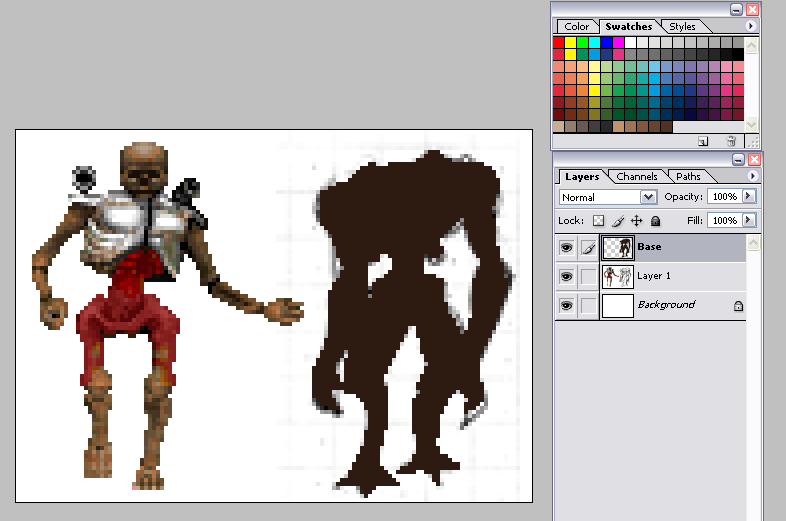
Now Lock this layer as you dont wanna screw it up when you color it.
-
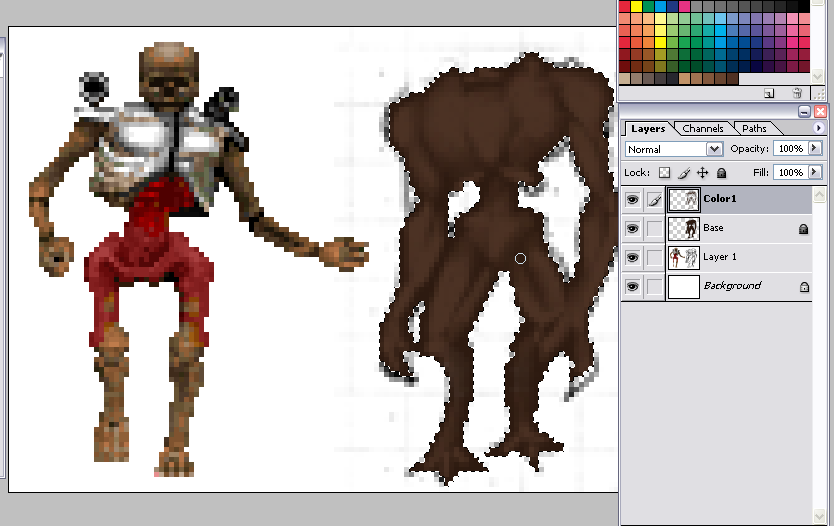
Coloring/Shading:
This step isn't as hard as it looks, as photoshtop as lots of useful tools that make sit pretty straight forward. However, it will require some understanding of light and shadow, but since this is doom sprites, it wont be that complex. To color use the Magic Wand tool to select the colored areas of you Base. Then make a new layer and color there.
First start with the darkest colors (note that your base should have the darkest colors). Make simple highlights on where the muscles and other areas of raised surfaces (such as the ribs) should be. If you need help on how muscles look, there are plenty of anatomy websites. Here is the first color layer:

After the colors are laid down, it's time to blend it. use the Smudge and draw the colors around the edges of your colored spots to smoth them out relative to the background. It should look like this when down:
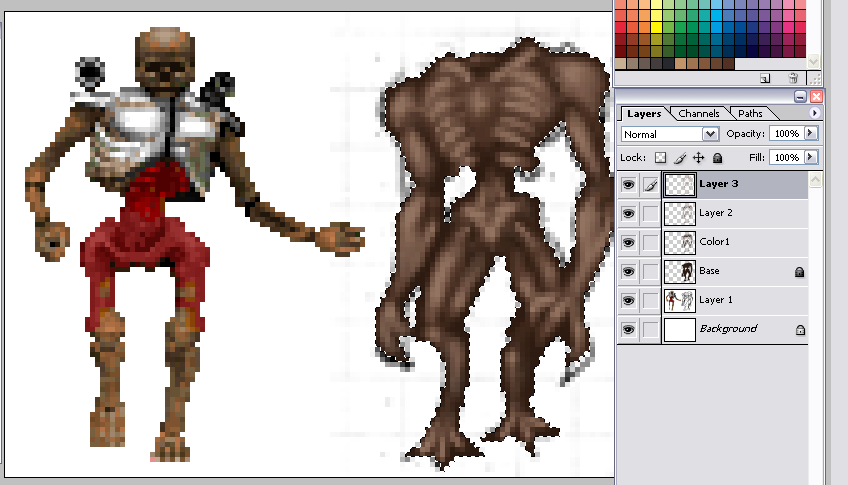
Repeat the process on several layers, with the lightest color-layers on the top. The finishe proect of 3 layers of colors should look something like this. Your monster should start taking on some shape now:
-
Texturing and Highlights:
This step is to add in contrast, lines of any short, and highlights, bumps, and other effects onto your monster. Again, always use a new layer for each step. First, is the shadows and lines. Make a new layer and use black to add in lines that helps distinquish one part of the monster from another. In this case, i used it on the ribs and a little on the arms and legs. Use the smudge tool again the smoth the stuff out. The finished product looks like this:

Next, if you see fit, add in minor highlights for further contrast. Use white and make a new layer (above or below that Lines/Shadow layer, depending on which you think looks better. I ususally put the Highlights under the lines) and add in some white spots, use the smudge tool to smoth it out, and then set the Layer to "OVERLAY" style. You can change the style depending on which you think looks better. The finished product looks like this:
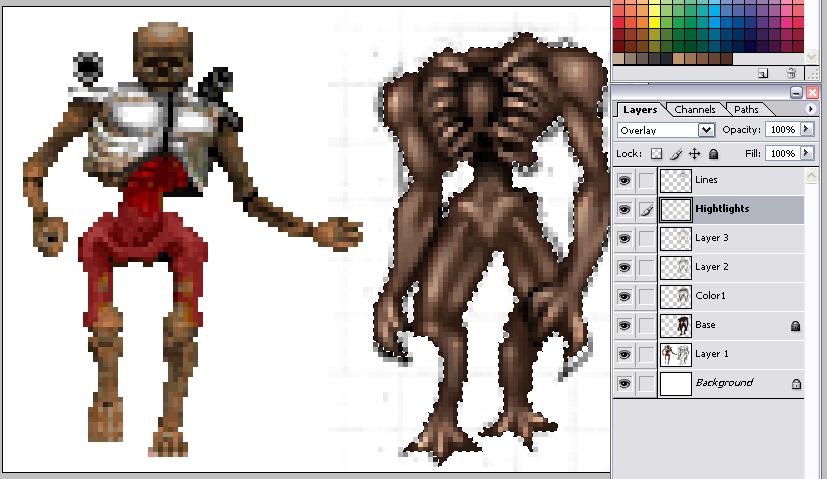
Your Sprite is Nearly finished. Finally, select the base layer and unlock it. Now, double click it to open the Layer properties menu. Check in Inner glow, change the color from that light-yellow to black, and set the mode on "Multiply". Change the "Size" to whatever you see fit 1 pixel is plenty for monst monsters. This adds a slight contrast to the edges of the monsters. The Finished product looks like this:

Change the opacity to whatever you see fit.
Finally, your sprite is basically done. Turn off the Layer with the size and drawing reference so only your Monster is left on the screen. Select the area and hold CTRL+SHIFT and press C to copy the Image with merged layers. Open Your wad editer and select one image from Doom or whatever game you are useing and save the image to your disc. This File will continue all and only the pallete from your game. When you paste it in, the colors for your sprite will be automatically converted. Although, it doesn't matter waht color you draw your mosnter in photoshop, since you canr resaturate it later, it's a good idea to note what colors are available in your came to prevent complications.
Paste your mosnter in and add in whatever minor details using MS paint or your program of choice. I usuall leave the claws, eyes, teach, and spikes out of the photoshop process as they are usally too small and generally easier to do by pixel-editing.

Completion:
Your sprite is not yet finished. note that you should color ALL the frames at the same time to help keep things consistent and help spot errors.
Here is the Finished Sprite (this is not how the Ignist will actually look, just a tutorial):

I hope this Tutorial is Helpful to some of you. I will make other tutorials on the recoloring, basic edit, complex edit, as well as weapons' stuff later one when I find the time. The process is very similar though.