
Using a Custom Texture
in a map for DOOM/BOOM format
You made a custom texture and you want to use it in your new map design. Here are the steps it takes to accomplish that.
2.Open your pwad with Slade3.
3. Under the map namespace make two new entries, P_START and P_END.
4. Now drag your new custom texture in betwen those marker.
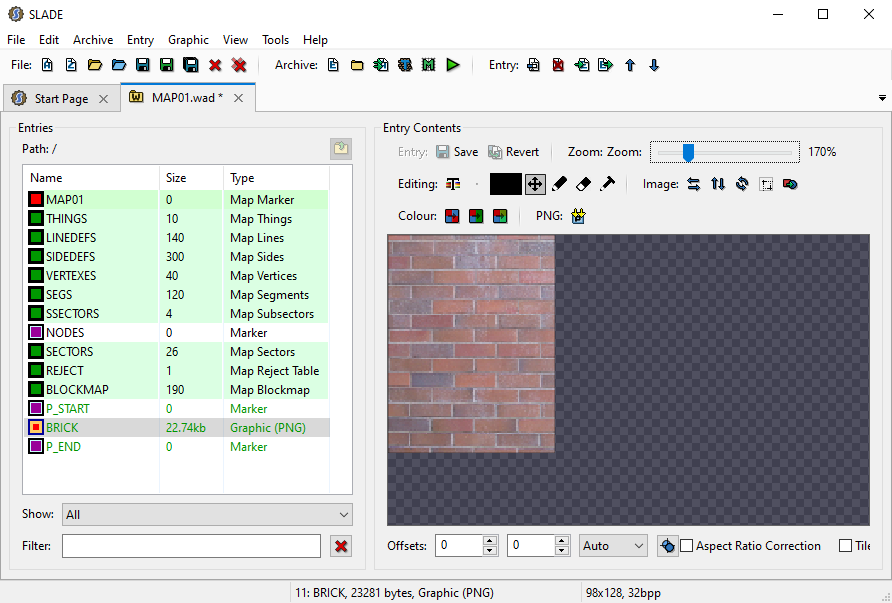
Now the image is referred to as a patch.
DOOM2/BOOM expects the patch to be in the Doom graphic format.
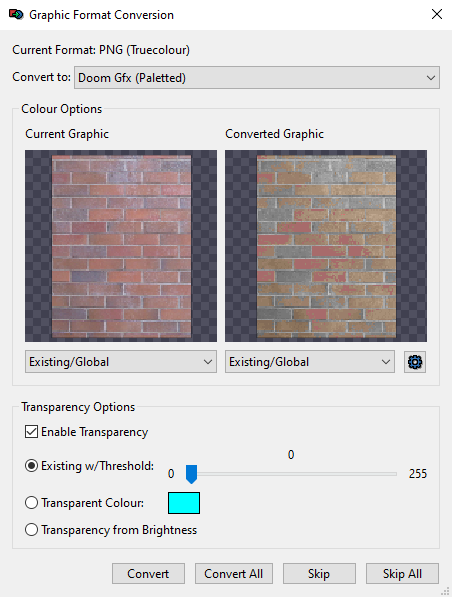
Conversion from png to Doom graphic format is simple.
5. Rightclick on the new patch, then select Graphic - Convert To:

Now comes the important step, to include the patch in the TEXTURE1 and PNAMES lumps.
6. Rightclick on the patch, then select Graphic - Add to TEXTUREx


7. click on Yes

8. Accept the defaults and click on OK.
This adds the required lumps, TEXTURE1, PNAMES and also a graphic S3DUMMY.

This will work if this pwad is loaded last, after Doom2.wad.
This will not work if this pwad is loaded before Doom2.wad.
The reason is that the last loaded TEXTURE1 lump will overwrite a previous TEXTURE1 lump.
To prevent any mishap, rename TEXTURE1 to TEXTURE2.

9. Save the pwad.
Now the game engine can use the texture in a map.
10. Open the pwad with your preferred map editor, for example

Now take a closer look when the texture is side by side in the editor

and in the game

That does not look right.
The texture does not tile properly and the edge transitions are too obvious. Plus the texture
should be 128 high x 64 wide.
If the texture is shorter than 128 high, then the height should be at least a power of 2. Also, the shorter texture should only be applied to a wall which is equal to or lower in height. The width can be any size, as long as it is a power of 2. For example 1024.
11. This must be corrected in a graphics app.
Resize the image to the correct size and tile it to be seamless so that no tramsitions are noticable.
Anyways, this is how to insert a custom texture in DOOM2/BOOM format maps.
Kappes Buur, May 07 2020